
How to Refinish a Wood Deck, See how we cleaned, pressure washed and painted a multi-level deck to give it a fresh look and to maintain it so it will last for years to come.
deck is a great way to add extra living space and increase your home’s value. But decks — especially all-wood decks — require maintenance to keep them secure, safe and looking good
Deck wash staining
If it has been a few years or even decades, since your deck has been given the attention it deserves ,
it may be time to make necessary repairs , give it a thorough cleaning and apply afresh coat of paint ,
or stain .
Determine Your Needs
A deck that is just a couple of years old or has received regular maintenance is still likely to benefit from a good cleaning. An older deck
may need repairs to railings or steps, replacement of splits or splintering planks , and decisions will need to be made
regarding the tape of stain used to protect and beautify the structure. TESTIMONIALS
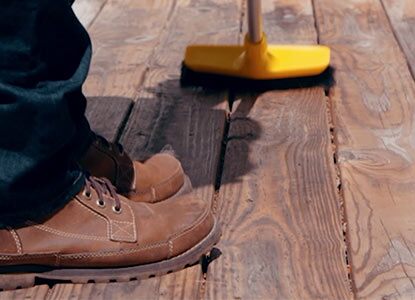
Sweep and Assess
Clear any furniture or plants from the deck, grab a broom and clear off surface debris. As you traverse the deck, make note of any split,
splintered or rotting lumber, raised screws or nails, rusted hardware and any other problems that will , westchesterpainters.net

Perfect — using a solid stain on the entire house is a great choice for long-lasting color and protection, especially on wood siding, decks, and fences. Here’s a full step-by-step guide so your job comes out clean, even, and professional-grade 👇
🧰 TOOLS & MATERIALS
- Power washer (1300–2500 PSI)
- Scrub brushes & extension pole
- Exterior cleaner or bleach solution (1 part bleach to 3 parts water)
- Painter’s tape & drop cloths
- Sandpaper or sander (60–80 grit for rough areas)
- Caulk, putty, wood filler (for repairs)
- Solid stain (oil- or acrylic-based)
- Paint sprayer, roller (¾” nap), or brush
🧼 STEP 1: PREP THE SURFACE
- Power Wash Entire House
- Use a 25° or 40° nozzle.
- Start from bottom to top with cleaner, then rinse top to bottom.
- Pressure: 1300–1600 PSI for wood, up to 2000 PSI for harder siding.
- Remove all dirt, mold, and loose paint/stain.
- Let dry at least 48 hours before staining.
- Repair & Sand
- Replace rotted or damaged wood.
- Lightly sand to remove rough spots, splinters, or peeling paint.
- Spot-sand shiny or glossy areas so stain adheres evenly.
- Mask & Protect
- Cover windows, trim, light fixtures, plants, and concrete with plastic or paper.
🎨 STEP 2: APPLY THE SOLID STAIN
- Stir Thoroughly
- Mix the stain well before and during application to keep color consistent.
- Application Tools
- Spray and back-brush for the smoothest, most even finish.
- You can also use a roller and brush if you don’t spray.
- Technique
- Work from top down (gables → walls → trim → bottom).
- Apply with the grain of the wood.
- Maintain a wet edge to avoid lap marks.
- Two coats are recommended for best durability and uniform color.
- Drying Time
- Allow 4–6 hours between coats (check manufacturer’s label).
- Don’t stain in direct sunlight or when rain is expected within 24 hours.
🏠 STEP 3: FINISH TRIM, DECK, PORCH & FENCE
You can use the same solid stain color or coordinate:
- Trim: lighter or darker shade for contrast.
- Deck/Porch: same product, but ensure it’s rated for horizontal surfaces.
- Fence: apply with sprayer or roller, one or two coats depending on coverage.
🌦️ FINAL TIPS
- Ideal temperature: 50°F–85°F (10°C–29°C).
- Humidity under 70% for best drying.
- Clean tools with soap and water (for acrylic stains) or mineral spirits (for oil-based).
- Maintain by washing once a year; recoat every 5–7 years as needed.