
Wallpaper Removal Walls Prep Interior Painting
Wallpaper Removal.
Is it Time for that old and faded wallpaper to go? Removing wallpaper can be tricky without theTESTIMONIALS
Proper tools and relevant experience. At our teams have years of experience removing wallpaper for all types of projects, From small residentials job
To we know all the tricks of the trade and can get the job done fast.
We have the Right tool floor removal. And additional we can repair the plaster wall, cracks , or sheetrock walls.
Fast end Effective Wallpaper Removal
If you don’t have the right equipment or training wallpaper removal in Westchester can be a slow and arduous task.
Our Crews’ Knowledge and experience combined with professional grade equipment enables us to remove wallpaper quickly
and effectively. we make sure your walls are scrapped completely clean, so that you can move on to the next step of the process.
Additionally we can repair any cracks or damage to yours walls that may have been hidden underneath the wallpaper. Once the walls are ready to go, we can start painting.westchesterpainter.net
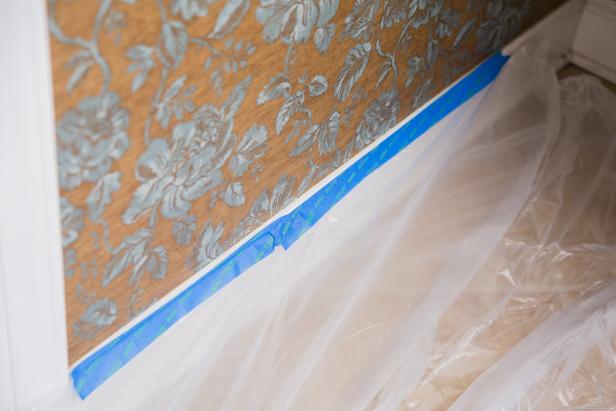
Step 1: Protect Floors and Electrical Outlets
Before beginning your wallpaper removal process, you’ll want to protect your floors since you’ll be spraying water onto the walls. Lay down a plastic painter’s tarp; you may want to secure the tarp to the floor using painter’s tape Your wall will probably have at least one electrical outlet; leave the outlet cover on and protect the entire area with painter’s tape . Once the majority of the wallpaper is removed, you can come back to the outlet and remove the final pieces under the outlet cover.

Here’s a clear, professional explanation you can use for your customers — or as a guide for doing the work:
Interior Drywall & Ceiling Pre-Paint Preparation
1. Protection & Setup
- Cover floors with drop cloths or plastic.
- Protect furniture or move it out of the room.
- Seal vents/light fixtures if needed to prevent dust spread.
2. Drywall Preparation
- Inspect for damage: holes, dents, nail pops, cracks.
- Repair:
- Patch holes with joint compound.
- Fix nail pops by re-screwing and covering with mud.
- Tape and mud cracks.
- Feather and smooth: apply 2–3 coats of compound as needed.
- Sanding:
- Sand patches smooth and flush with the wall.
- Use pole sander or vacuum sander to reduce dust.
- Dust removal: wipe or vacuum walls to remove fine dust.
3. Ceiling Preparation
- Repair cracks, stains, or texture issues.
- Sand lightly where needed.
- Prime over water stains or repairs with stain-blocking primer.
4. Priming
- Prime all repaired areas or entire walls for best results.
- Use drywall primer or high-hide primer for new construction.
- Priming ensures paint adheres evenly and avoids flashing.
5. Caulking & Final Touches
- Caulk gaps at trim, corners, and baseboards.
- Check for rough spots or imperfections and fix before painting.
- Ensure the room is clean, dust-free, and ready for finish coats.
6. Ready for Paint
- Apply ceiling paint first.
- Then cut in and roll walls.
- Maintain a clean jobsite throughout for a neat, professional finish.
If you want, I can also create:
✅ a checklist
✅ a short version for advertising
or
✅ a step-by-step guide for your crew